8 Chair Balance Exercises for Seniors (Seated and Standing)
8 chair balance exercises for seniors: 4 seated moves and 4 standing moves that use the chair for support, with doses, safety tips and a 12-week plan.
EyeRehab - VOR Training Team
Published on November 13, 2026
Listen to this article
Natural Language Narration · 14 min
Quick answer
What are the best chair balance exercises for seniors?
The most useful chair balance exercises for seniors are seated marching, side reaches, toe raises and head turns, followed by sit-to-stands, heel raises, side leg raises and single-leg stance while holding the chair. Do them at least three times a week and make them gradually harder for 12 weeks or more.
Reviewed on November 13, 2026
Why Chair Exercises Are a Smart Place to Start
At least one in three people over 65 falls each year. Exercise is one of the best-studied ways to lower that risk. A Cochrane review of 108 trials found that exercise programs cut the rate of falls in older adults living at home by 23%. Programs built mainly on balance and functional exercises cut it by 24%.
A sturdy chair makes that kind of training easier to begin. You can sit down whenever you need to, hold the backrest when you stand, and use the seat for one of the most useful exercises there is: standing up and sitting down. The eight chair balance exercises for seniors below start seated and move to standing with the chair for support, so you can begin where you are today and build from there.
What are the best chair balance exercises for seniors?
The best chair balance exercises for seniors combine seated moves that build strength and trunk control with standing moves that use the chair for support, such as sit-to-stands, heel raises, side leg raises and single-leg stance. Exercises 1 to 4 are done sitting. Exercises 5 to 8 are done standing behind or beside the chair.
| Exercise | Position | Starting dose | Level |
|---|---|---|---|
| 1. Seated marching | Seated | 10 lifts per leg | Beginner |
| 2. Seated side reaches | Seated | 5 to 10 reaches per side | Beginner |
| 3. Seated toe raises | Seated | 10 to 15 per foot | Beginner |
| 4. Seated head turns with a target | Seated | 30 to 60 seconds, 2 to 3 times | Beginner (for dizziness with head movement) |
| 5. Sit-to-stand | Seated to standing | 5 to 10, building to 10 to 15 | Beginner to intermediate |
| 6. Standing heel raises | Standing, holding the chair | 10 to 15 | Intermediate |
| 7. Side leg raises | Standing, holding the chair | 10 per leg | Intermediate |
| 8. Single-leg stance | Standing, holding the chair | Up to 10 seconds per leg, building to 30 | Intermediate to advanced |
1. Seated Marching
Seated marching strengthens the hips and trains your trunk to stay steady while one leg moves. It is the same control you use every time you lift a foot to take a step.
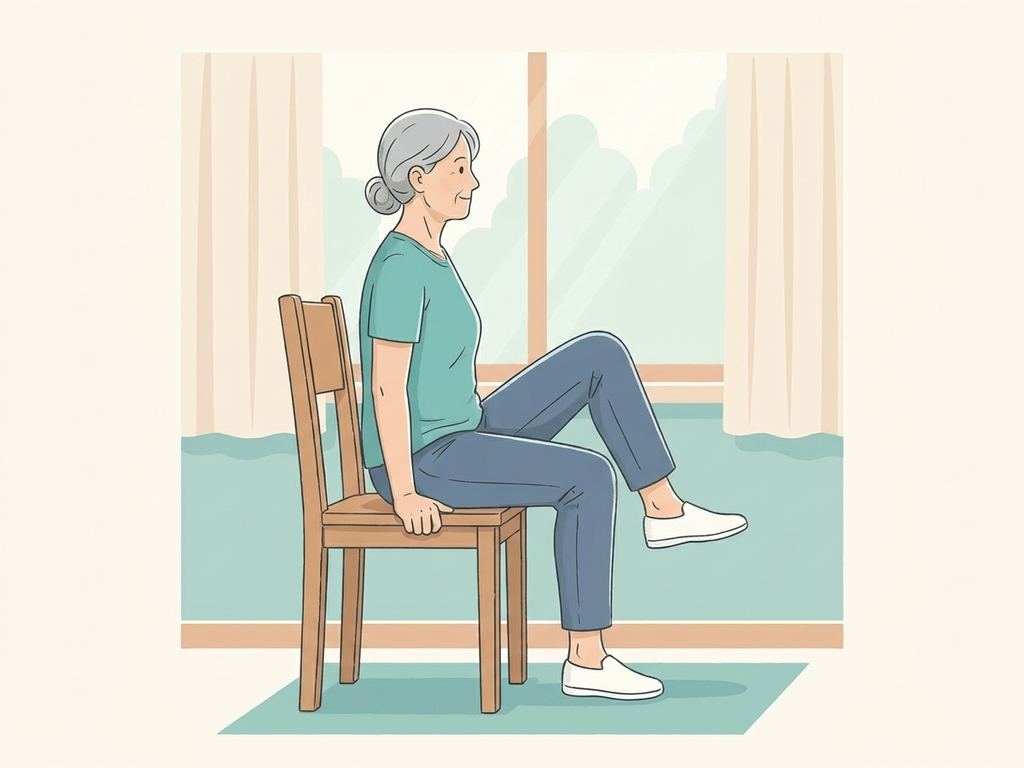
- Setup: Sit near the front of a sturdy chair with no wheels, feet flat and hip-width apart. Sit tall without leaning on the backrest. Hold the sides of the seat if you need to.
- Steps:
- Lift your right knee a few inches so your foot leaves the floor.
- Hold for one to two seconds, then lower the foot with control.
- Repeat with your left leg.
- Do 10 lifts with each leg.
- Progression: Let go of the seat and cross your arms over your chest, lift the knee higher, or hold each lift for three seconds.
- Common Mistakes & Tips: Don’t lean back or slump to get the knee up. That shifts the work from your hips to the backrest. Breathe normally throughout.
2. Seated Side Reaches
Reaching sideways moves your weight toward the edge of your base of support and teaches your trunk muscles to bring you back to center. You use that skill every time you reach for something on a shelf or in a cupboard.
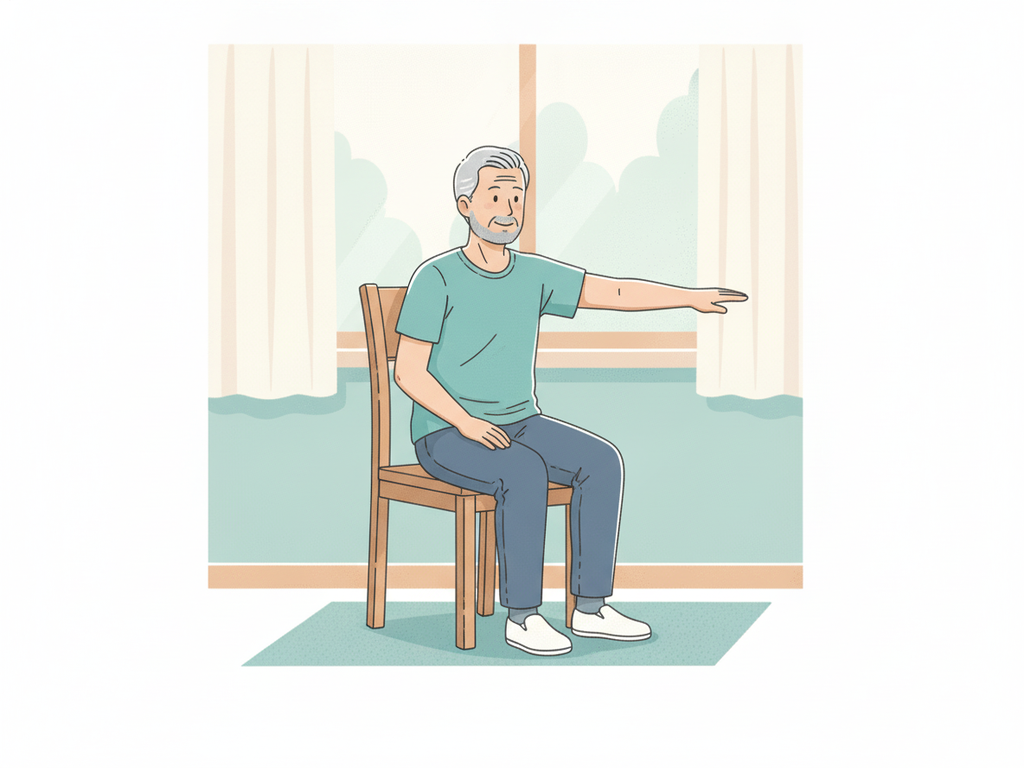
- Setup: Sit tall near the front of the chair with your feet flat and slightly wider than hip-width. Place one hand on the side of the seat.
- Steps:
- Reach your free arm out to the side at shoulder height, as if reaching for something just out of range.
- Go only as far as you can while keeping both feet flat and both hips on the seat.
- Hold for two seconds, then sit back up tall.
- Do 5 to 10 reaches, then switch sides.
- Progression: Reach a little farther, reach forward and to the side on a diagonal, or do the exercise without holding the seat.
- Common Mistakes & Tips: Stop the reach before you feel you might slide or tip. Start with short reaches and widen the range over the weeks.
3. Seated Toe Raises
Lifting your toes strengthens the muscles at the front of the shin that raise your foot as you step. When those muscles are weak, your toes are more likely to catch on a rug edge or a step, which can lead to a trip.
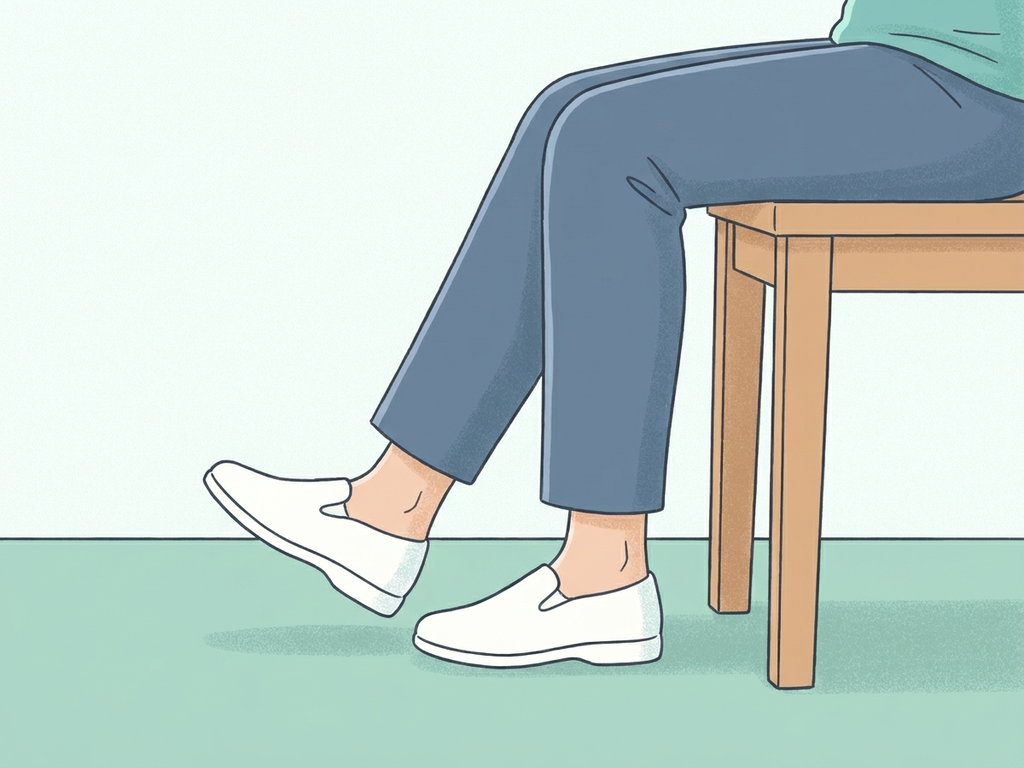
- Setup: Sit tall with your knees bent at about 90 degrees and your feet flat on the floor.
- Steps:
- Keep your heel on the floor and lift the front of one foot as high as you can.
- Hold for two seconds, then lower it slowly.
- Do 10 to 15 raises with each foot.
- When that is easy, lift both feet together.
- Progression: Add seated heel raises (lift your heels and keep your toes down), then alternate toe and heel raises in a slow rocking motion. When this feels easy, move on to exercise 6.
- Common Mistakes & Tips: Move slowly. Quick, flicking movements use momentum instead of muscle.
4. Seated Head Turns With a Target (VOR x1)
If turning your head makes you dizzy, or makes things look blurry or jumpy, this exercise is for you. It trains the vestibulo-ocular reflex (VOR), which keeps your vision steady while your head moves. Gaze stabilization exercises like this one are a standard part of vestibular rehabilitation and the core of the EyeRehab app.
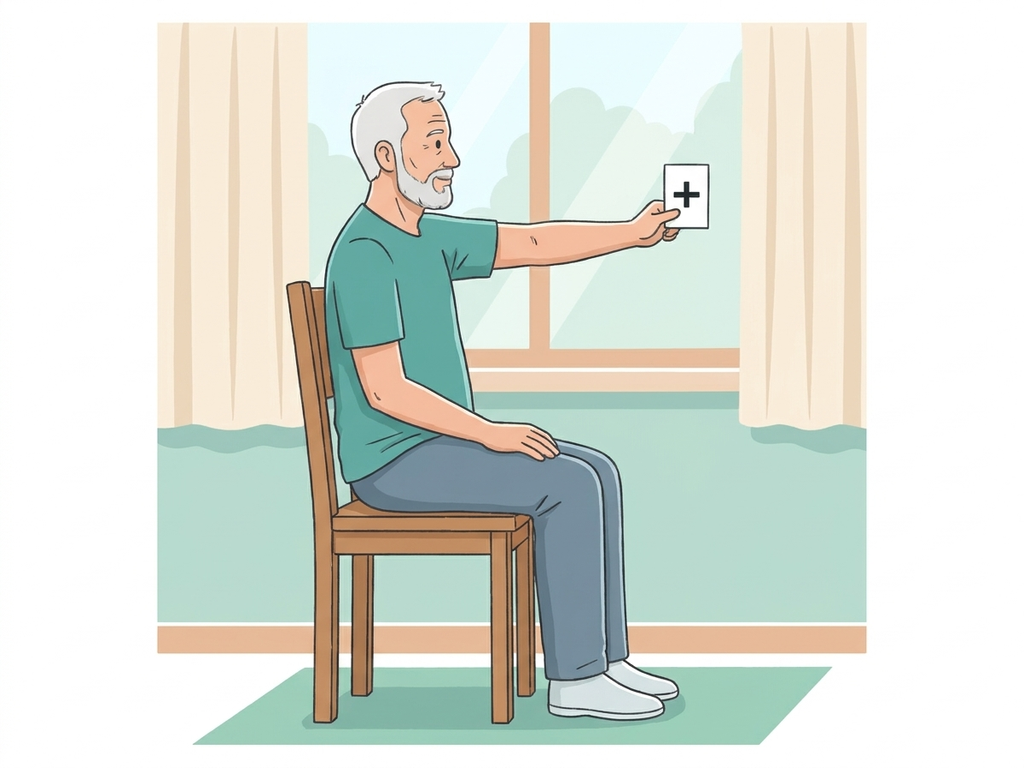
- Setup: Sit upright. Hold a card with a letter or symbol on it (a business card works) at arm’s length, straight in front of your nose at eye level.
- Steps:
- Keep your eyes on the card.
- Turn your head slowly a short distance left and right, as if saying “no,” while the card stays still.
- Keep the letter in focus. If it blurs, slow down.
- Continue for 30 to 60 seconds, rest, and repeat 2 to 3 times.
- Progression: Turn a little faster while keeping the target clear, add up-and-down (“yes”) head movements, or do it standing with the chair beside you.
- Common Mistakes & Tips: Move your head, not the card. Mild dizziness that settles soon after you stop is common with this exercise. If it is strong or does not settle, stop and talk to your doctor or physical therapist.
5. Sit-to-Stand (Chair Stands)
Standing up from a chair is a strength exercise and a balance exercise at once. The World Falls Guidelines give it as an example of the functional exercise that prevents falls, and the CDC recommends it to older adults as the “chair rise” exercise.
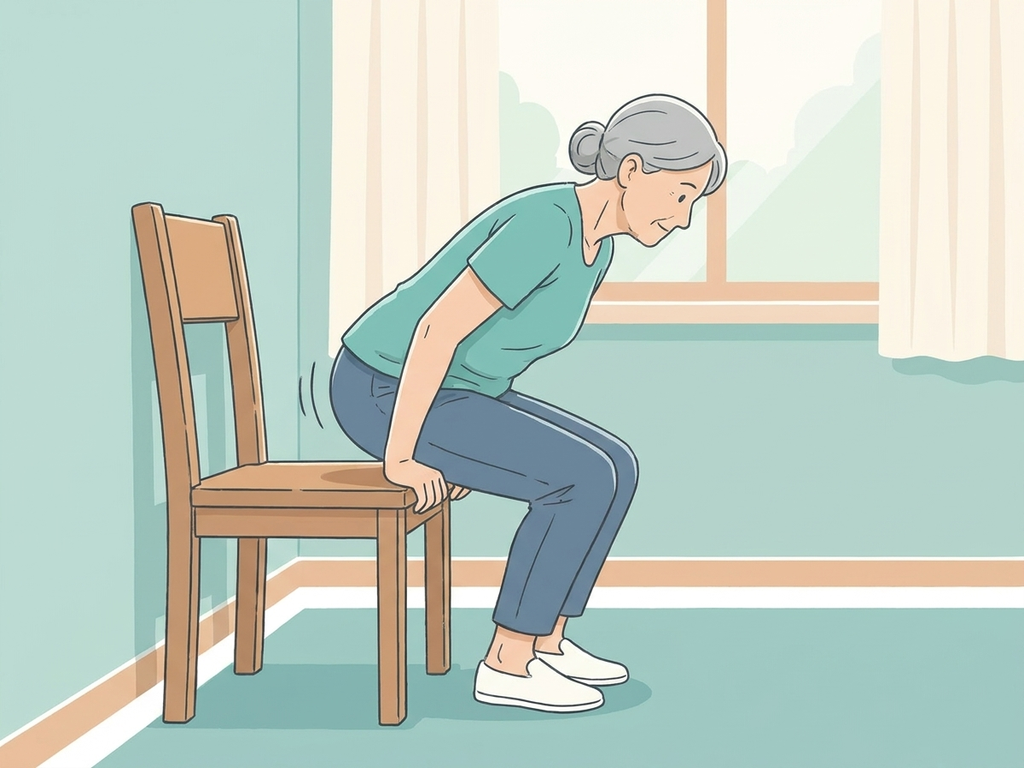
- Setup: Put the chair against a wall so it can’t slide. Sit near the front of the seat with your feet flat, hip-width apart and slightly behind your knees.
- Steps:
- Rest your hands lightly on the seat beside your thighs, or on the armrests if your chair has them.
- Lean forward until your nose is over your toes.
- Push through your heels and stand up, using your hands as little as possible.
- Stand tall for a moment, then lower yourself slowly until you are sitting.
- Start with 5 to 10 and work up to 10 to 15, the target in the CDC’s handout.
- Progression: Use one hand, then no hands with your arms crossed over your chest. Take three to five seconds to sit back down.
- Common Mistakes & Tips: Don’t drop into the chair. The slow lowering is where much of the strength is built. Keep your knees pointing over your toes instead of letting them fall inward.
6. Standing Heel Raises
Heel raises strengthen your calves, the muscles that pull you back when you start to sway forward. Rising onto your toes also shrinks your base of support, so your balance has to work harder.
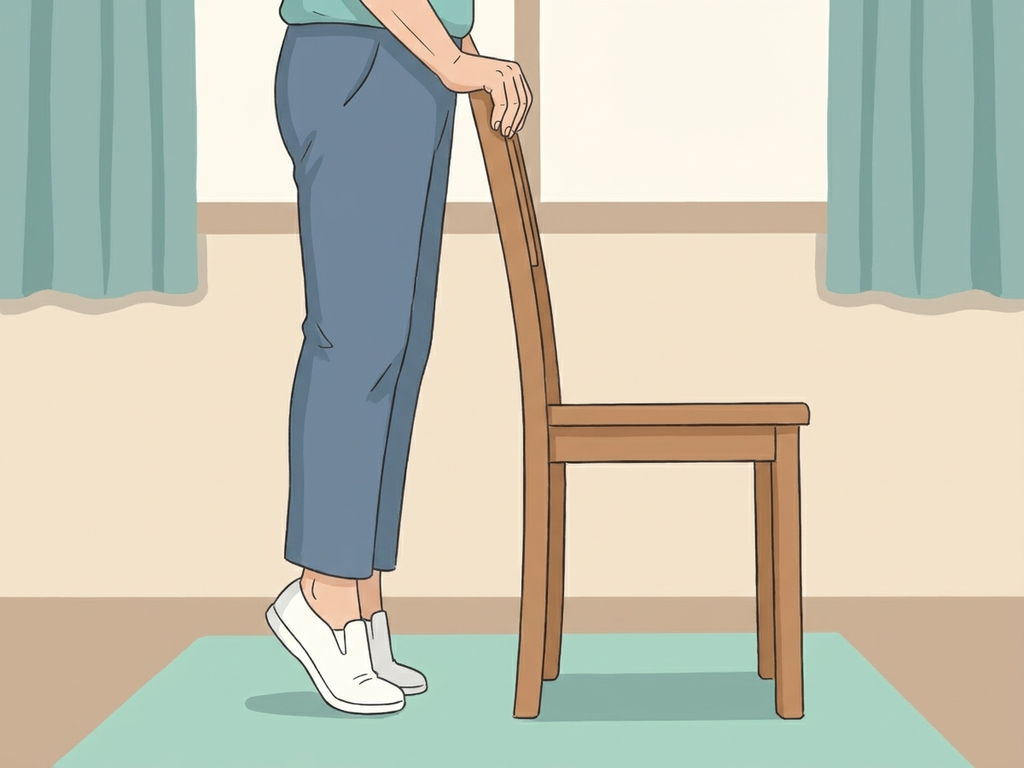
- Setup: Stand behind the chair with your feet hip-width apart and both hands on the backrest. Stand close enough that your elbows are slightly bent.
- Steps:
- Rise up onto the balls of your feet, lifting both heels as high as is comfortable.
- Hold for two seconds.
- Lower your heels slowly to the floor.
- Do 10 to 15 raises.
- Progression: Hold the chair with one hand, then with just your fingertips. Later, add standing toe raises: hold the chair and lift the front of both feet.
- Common Mistakes & Tips: Keep your body upright. Don’t push your hips back or pull on the chair. If your calves cramp, do fewer and rest between sets.
7. Side Leg Raises
Side leg raises strengthen the muscles on the outside of the hip. Those muscles keep your pelvis level whenever you stand on one leg, which you do with every step.
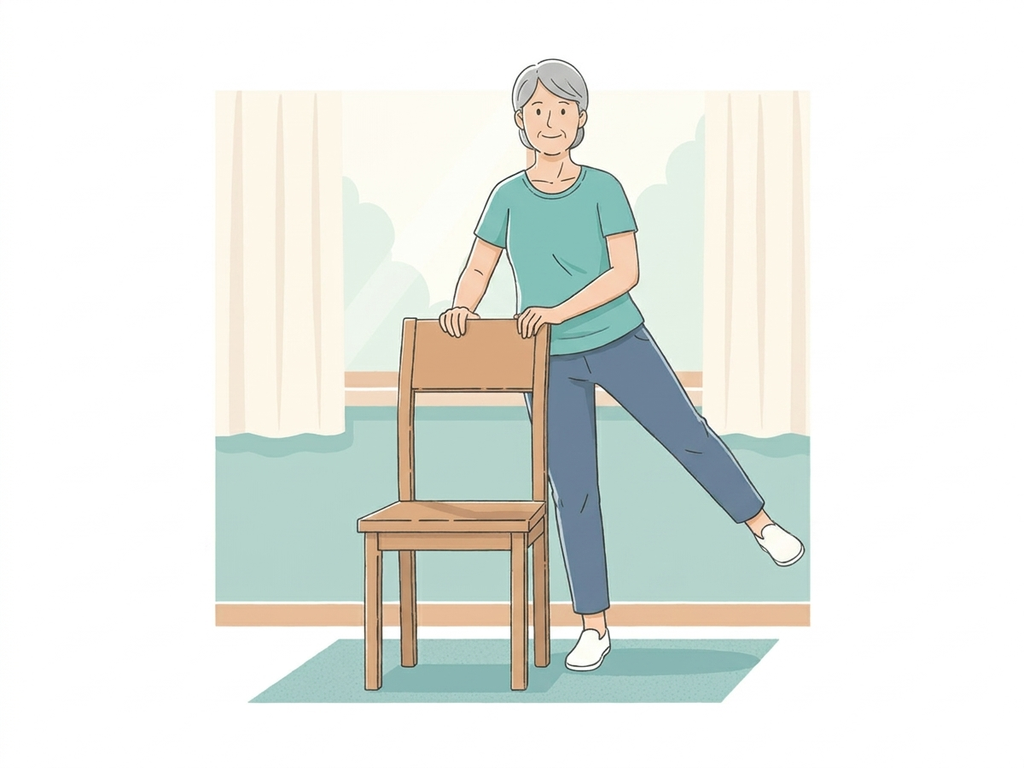
- Setup: Stand tall behind the chair with your feet together and both hands on the backrest.
- Steps:
- Lift your right leg out to the side, keeping the knee straight and the toes pointing forward.
- Raise it only as far as you can without leaning your upper body to the left.
- Hold for one second, then lower it slowly.
- Do 10 raises, then switch legs.
- Progression: Take three seconds to lower the leg, or hold the chair with one hand. Ask a physical therapist before you add ankle weights.
- Common Mistakes & Tips: A small, controlled lift with an upright trunk does more than a big swing with a lean.
8. Single-Leg Stance
Standing on one leg is a direct balance challenge. It copies the moment in every step when all your weight is on one foot.
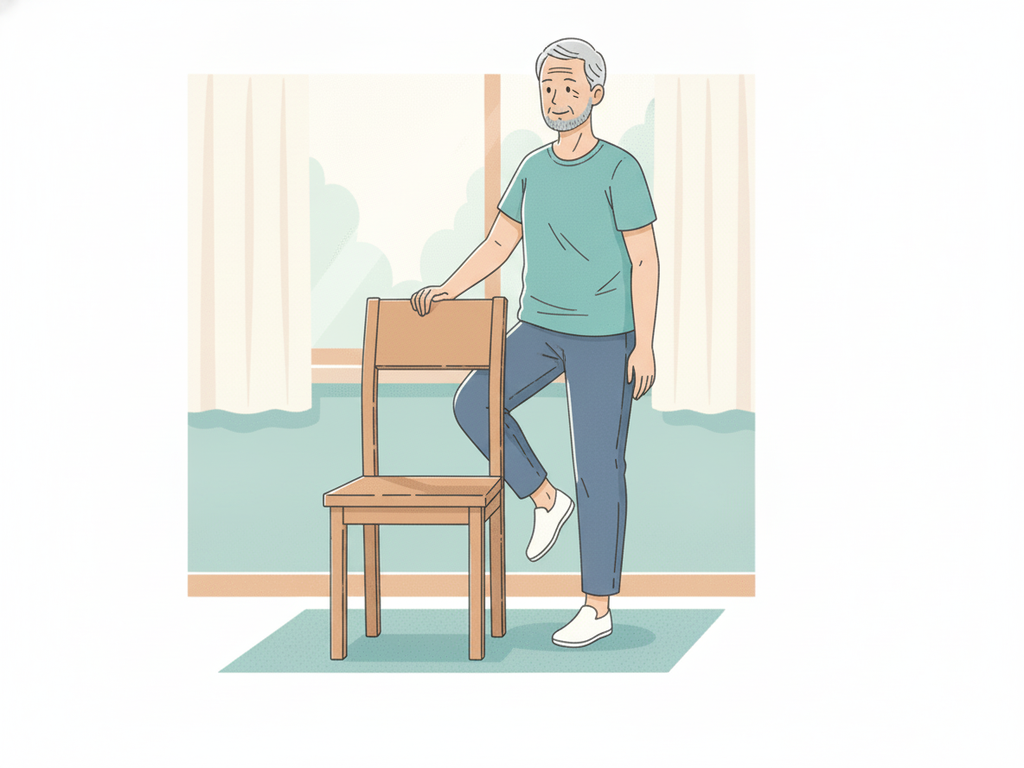
- Setup: Stand beside or behind the chair with both hands on the backrest.
- Steps:
- Shift your weight onto your right leg.
- Lift your left foot a few inches off the floor.
- Hold for up to 10 seconds, keeping your hips level.
- Lower the foot and switch legs. Repeat 3 to 5 times per leg.
- Progression: Build up to 30 seconds. Then go from two hands to one hand, to fingertips, to hands hovering just above the chair. Only try it with your eyes closed if a clinician says it suits you, and with someone beside you.
- Common Mistakes & Tips: Don’t lean your trunk sideways or lock your standing knee. Keep your eyes on a fixed point at eye level.
Can seniors improve balance with seated exercises only?
Seated exercises improve strength, but on their own they probably won’t give you the full fall-prevention benefit. A 2021 review of 25 studies found that chair-based exercise programs improved grip strength, arm strength and the 30-second chair stand test in older adults. The trials that show fewer falls, though, mostly used exercises that challenge balance while standing and stepping.
Treat the seated exercises as your starting point and warm-up, and work toward the standing ones:
- Stage 1: Seated exercises 1 to 4, plus sit-to-stands using your hands.
- Stage 2: Standing exercises 6 to 8, holding the chair with both hands.
- Stage 3: The same exercises with one hand on the chair.
- Stage 4: Fingertips only, then hands hovering just above the chair.
If you can’t stand safely yet, seated exercise is still worth doing. It builds the strength that makes standing practice possible. A physical therapist can tell you when you are ready for the next stage.
How often should seniors do chair balance exercises?
The 2022 World Falls Guidelines recommend balance and functional exercises, such as sit-to-stands and stepping, three or more times a week. The program should get gradually harder for at least 12 weeks and continue after that for a bigger effect. Sessions of 10 to 15 minutes are a realistic start.
Here is a sample 12-week plan built on that advice:
| Weeks | What to do | How often |
|---|---|---|
| 1–2 | Exercises 1 to 4, plus sit-to-stands using your hands | 3 days a week |
| 3–4 | Add heel raises and side leg raises, holding the chair with both hands | 3 days a week |
| 5–8 | Add single-leg stance, move to one hand on the chair, slow down the sit-to-stands | 3 or more days a week |
| 9–12 | Fingertip support or hovering hands, sit-to-stands without hands, seated moves as your warm-up | 3 or more days a week |
After 12 weeks, keep going. The same guidelines also recommend adding Tai Chi or progressive strength training where you can.
How do you do chair exercises safely?
- Choose the right chair: Use a sturdy chair with four legs, no wheels and no folding parts. Put it against a wall or a heavy counter so it can’t slide.
- Clear the space: Move rugs, cords and clutter out of the way. Wear supportive closed shoes rather than socks or loose slippers.
- Have help nearby: If you have fallen recently or feel unsteady, do the standing exercises with someone beside you, or stand in a corner with the chair in front of you.
- Stop when something feels wrong: Sit down if you feel faint, short of breath or more than mildly dizzy.
- Get checked: If you have fallen in the past year, worry about falling, or feel unsteady when you stand or walk, ask your doctor about a fall risk check. The World Falls Guidelines recommend a full falls risk assessment for older adults at high risk.
Call emergency services if you have chest pain, fainting, a sudden severe headache, trouble speaking, or weakness or numbness on one side of the body.
Key Takeaways
- Start where you are: Seated exercises build strength and confidence if standing practice feels too hard right now.
- Stand as soon as it is safe: The exercises linked to fewer falls challenge your balance while standing. The chair is support, not the whole workout.
- Sit-to-stands earn their place: The chair rise trains strength and balance together, and fall-prevention guidelines name it specifically.
- Three times a week, for 12 weeks or more: Make the exercises gradually harder by using fewer hands on the chair, slower movements and longer holds.
- Dizziness with head movement is trainable: Gaze stabilization exercises such as VOR x1 are a standard part of vestibular rehabilitation.
Build Your Routine with EyeRehab
If dizziness when you turn your head is part of what makes you unsteady, the EyeRehab - VOR Training app guides you through VOR x1, VOR x2, saccades, smooth pursuits and static balance exercises. It tracks your symptoms before and after each session and adjusts the difficulty as you improve. The app is free for patients.
Would you rather work with someone in person? Find a vestibular clinician near you. Physical therapists can use EyeRehab with their patients to assign home exercise programs and follow progress between visits.
Medical Disclaimer
This content is for informational and educational purposes only and does not constitute medical advice, diagnosis or treatment. Talk to your doctor or physical therapist before starting a new exercise program, especially if you have fallen recently, have heart or lung problems, or have had recent surgery. If you have severe dizziness, sudden vision changes or a sudden loss of balance, seek medical attention immediately.
Related reading
Frequently Asked Questions
What are the best chair balance exercises for seniors?
Start with seated marching, seated side reaches, seated toe raises and seated head turns with a target. When those feel easy, add sit-to-stands, then heel raises, side leg raises and single-leg stance while holding the back of a sturdy chair. The standing exercises matter most for preventing falls, because exercise that challenges balance while standing is what research links to fewer falls.
Can seniors improve balance with seated exercises only?
Seated exercises build strength and confidence. A review of 25 studies found that chair-based programs improved grip strength, arm strength and the 30-second chair stand test. The fall-prevention evidence, though, comes mostly from exercise that challenges balance while standing and stepping. Use seated exercises as a starting point or warm-up, and add standing exercises with the chair for support as soon as it is safe for you.
How often should seniors do chair balance exercises?
The 2022 World Falls Guidelines recommend balance and functional exercise, such as sit-to-stands and stepping, three or more times a week. The program should get gradually harder for at least 12 weeks and continue after that for a bigger effect. Sessions of 10 to 15 minutes are a realistic way to start.
What should I do if I feel dizzy during chair exercises?
Sit down and rest until it passes. Mild dizziness that settles soon after you stop is common with head-movement exercises. Stop and contact your doctor if it is strong or does not settle. Call emergency services for chest pain, fainting, a sudden severe headache, trouble speaking, or weakness or numbness on one side of the body.
Tags
Written by
EyeRehab - VOR Training Team
Expert insights on vestibular rehabilitation and eye health.
Related Articles

What Happens to Your Eyes During BPPV? Nystagmus Explained
During BPPV, your eyes jerk in a pattern called nystagmus. See what it looks like, how the Dix-Hallpike test reads it and why it decides your maneuver.
EyeRehab - VOR Training Team
November 20, 2026

How to Record Nystagmus With Your Phone for Your Doctor
How to film nystagmus on your phone so your doctor can see it: safety first, light, distance, a step-by-step checklist, and what a 2026 UCL study found.
EyeRehab - VOR Training Team
November 20, 2026

Is Nystagmus Dangerous? Warning Signs and When to Get Help
Nystagmus itself isn't dangerous, but its cause can be. Learn the stroke warning signs, what the HINTS exam is, and when to see a doctor or go to the ER.
EyeRehab - VOR Training Team
November 20, 2026